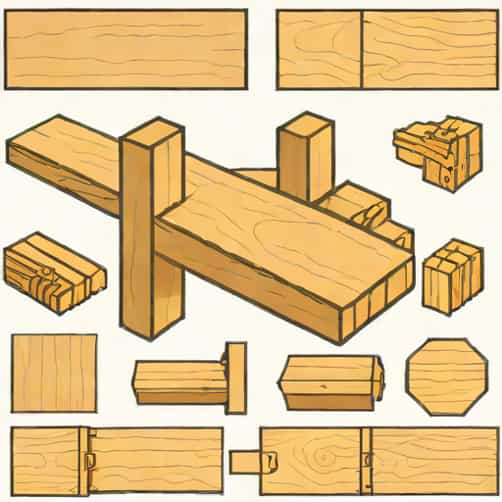
When it comes to woodworking, mastering joinery techniques such as mortise and tenon joints is essential for creating strong, durable, and aesthetically pleasing furniture and structures. A common question among woodworkers, both novice and experienced, is whether to cut the mortise or the tenon first. The answer to this question can significantly affect the precision, fit, and overall success of a joint. Understanding the workflow, tools, and reasoning behind the order of cutting will help woodworkers achieve better results while minimizing mistakes and material waste. This discussion explores the considerations, advantages, and practical tips for deciding which component to cut first when creating a mortise and tenon joint.
Understanding Mortise and Tenon Joints
A mortise and tenon joint is a classic woodworking technique used to connect two pieces of wood, typically at a 90-degree angle. The mortise is a cavity or slot cut into one piece of wood, while the tenon is a corresponding projection on the end of the other piece. When fitted together, the tenon slides into the mortise, creating a strong interlocking joint. This type of joinery is widely used in furniture, cabinetry, doors, and frames due to its structural integrity and ability to withstand both tension and compression forces.
Components of the Joint
- MortiseThe hollow cavity or slot that receives the tenon.
- TenonThe protruding tongue or end cut designed to fit precisely into the mortise.
- ShouldersThe edges around the tenon that help seat the joint securely.
- CheeksThe flat surfaces on the sides of the tenon that contact the mortise walls.
Factors to Consider Before Cutting
Deciding whether to cut the mortise or tenon first depends on several factors, including accuracy, tool usage, material characteristics, and personal preference. Both approaches have their advantages, and understanding these will allow woodworkers to choose the best method for their project. Key considerations include the precision of the fit, the ease of layout, and the potential for mistakes that could compromise the joint.
Material and Layout
- Wood type Hardwoods can be less forgiving, making careful planning essential.
- Measurement accuracy Ensuring that the mortise and tenon match requires precise marking and cutting.
- Layout tools Using marking gauges, squares, and calipers helps maintain consistent dimensions.
- Grain direction Aligning the grain can affect the strength and appearance of the joint.
Advantages of Cutting the Mortise First
Many woodworkers prefer to cut the mortise before the tenon for several practical reasons. By creating the mortise first, the exact dimensions and position of the cavity are established. This allows the tenon to be carefully shaped to fit perfectly into the mortise, reducing the likelihood of a loose or tight joint. Cutting the mortise first also enables adjustments to the tenon if minor errors occur during the mortise layout, providing more control over the final fit.
Practical Benefits
- Ensures a precise fit The tenon can be shaped to match the mortise exactly.
- Reduces waste Less risk of removing too much material from the tenon.
- Flexibility Allows fine-tuning of the tenon for snugness without compromising the mortise.
- Better alignment Mortises cut with templates or machines set a consistent standard for multiple joints.
- Minimizes errors Correcting the tenon is easier than adjusting a mortise.
Advantages of Cutting the Tenon First
While cutting the mortise first is common, some woodworkers choose to cut the tenon first. This approach can be beneficial when the tenon size is critical to the project, such as when using pre-cut stock or when multiple tenons must match exactly across several pieces. Cutting the tenon first provides a physical template for marking and sizing the mortise, ensuring the cavity is precisely the right width and depth to accommodate the tenon.
Practical Benefits
- Consistency Useful for repeatable joints in production work or furniture sets.
- Ease of marking The tenon acts as a guide for mortise layout.
- Material preservation Avoids over-cutting the mortise since it is tailored to the tenon.
- Visual confirmation Fitting the mortise to the pre-cut tenon helps visualize the joint before final assembly.
- Reduced risk of misalignment The tenon ensures the mortise is placed accurately for a snug fit.
Tools and Techniques for Accuracy
Regardless of the order chosen, the tools and techniques used play a significant role in achieving a precise mortise and tenon joint. Hand tools like chisels, mallets, and marking gauges are traditional methods, while power tools such as routers, mortising machines, and table saws provide faster and more consistent results. The choice of tools often influences the decision on whether to cut the mortise or tenon first.
Hand Tools
- Marking gauge Ensures accurate layout for both mortise and tenon.
- Chisels Allow precise removal of material for mortises and refinement of tenons.
- Mallet Provides controlled force for chiseling without damaging the wood.
- Hand saw Useful for cutting tenons with accuracy.
- Square Confirms right angles and alignment.
Power Tools
- Router Efficient for clean mortise cuts and shaping tenons.
- Mortising machine Speeds up repetitive mortise cutting with precision.
- Table saw with tenoning jig Allows consistent tenon dimensions.
- Bandsaw Useful for cutting tenons quickly and accurately.
- Drill press Can assist in clearing mortise material before chiseling.
Best Practices
Regardless of whether you cut the mortise or tenon first, following best practices ensures the joint fits well and performs structurally. Accurate measurement, careful layout, and test fitting are crucial steps in successful joinery. Many woodworkers recommend making a mock-up or practicing on scrap material before working on the final piece. Regular checking with squares and calipers helps maintain precision, while incremental adjustments allow for a perfect fit without over-cutting or weakening the joint.
Tips for Success
- Double-check all measurements before cutting.
- Start with conservative cuts and refine gradually.
- Use scrap wood to practice the joint first.
- Maintain sharp tools to ensure clean, accurate cuts.
- Test fit frequently to avoid mistakes that require major adjustments.
Deciding whether to cut the mortise or tenon first depends on the woodworker’s approach, project requirements, and preferred workflow. Cutting the mortise first is often favored for precision and flexibility, while cutting the tenon first can ensure consistency and serve as a template for the mortise. Both methods have advantages, and mastery of either approach requires practice, careful measurement, and attention to detail. By understanding the principles behind mortise and tenon joinery, woodworkers can make informed decisions and create strong, precise joints that stand the test of time. Ultimately, whether you choose to cut the mortise or tenon first, focusing on accuracy, tool selection, and best practices will result in high-quality woodworking projects that are both functional and visually appealing.
In summary, the order of cutting in mortise and tenon joinery is a matter of preference influenced by the specific needs of a project. Both approaches have their merits, and understanding when to use each method enhances efficiency and quality. By combining proper planning, precise tools, and careful technique, woodworkers can achieve joints that are strong, durable, and aesthetically pleasing, ensuring their projects are successful and long-lasting.