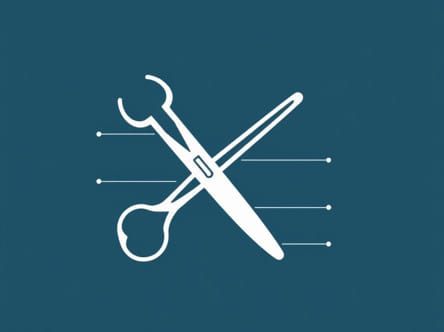
Hemostats are essential surgical instruments widely used in medical procedures to control bleeding, manipulate tissues, and secure blood vessels. Understanding the parts of a hemostat is crucial for both medical students and healthcare professionals to ensure proper handling, effective use, and maintenance of this vital tool. Each part of the hemostat serves a unique function that contributes to its overall performance in the operating room.
Introduction to Hemostats
Hemostats, also referred to as hemostatic forceps, are designed to clamp blood vessels or tissues to prevent excessive bleeding during surgeries. These instruments are commonly made from stainless steel for durability and ease of sterilization. The precise design of a hemostat allows surgeons and medical staff to apply controlled pressure on delicate tissues without causing unnecessary damage. Proper knowledge of the instrument’s parts enhances surgical efficiency and patient safety.
Main Parts of a Hemostat
A standard hemostat consists of several key parts, each contributing to its functionality. Learning to identify and understand these parts is important for anyone working in surgical or clinical environments.
1. Tips
The tips of a hemostat are the distal ends of the instrument and are used to grasp, clamp, or hold tissues and vessels. Tips can be straight or curved, depending on the specific surgical application. The precision of the tips allows surgeons to reach difficult areas while minimizing trauma to surrounding tissues.
2. Jaws
The jaws are the part of the hemostat located just behind the tips. They provide the gripping surface that clamps onto vessels or tissues. Jaws often have fine serrations or cross-hatching patterns to enhance the grip and prevent slippage during procedures.
3. Box Lock
The box lock is the pivot point where the two arms of the hemostat cross and rotate. This critical part ensures smooth operation and allows the forceps to open and close efficiently. A well-maintained box lock prevents wobbling and maintains consistent clamping pressure.
4. Shanks
Shanks are the long, slender arms of the hemostat extending from the box lock to the finger rings. They provide leverage for clamping and allow the user to apply precise force to the tips and jaws. Shanks must be straight and rigid to ensure stability during use.
5. Finger Rings
Finger rings are located at the proximal end of the hemostat and are used to hold and control the instrument. Typically, they accommodate the thumb and index finger, allowing for controlled movements and fine adjustments. Proper placement of fingers in these rings is crucial for ergonomic use and effective control.
6. Ratchet Lock
The ratchet lock is a series of interlocking teeth located near the finger rings. This mechanism allows the hemostat to lock in a closed position, maintaining constant pressure on clamped tissues without continuous manual effort. The ratchet lock is especially useful for holding vessels during lengthy procedures, reducing hand fatigue for the surgeon.
7. Shank Joints
Shank joints refer to the area near the box lock where the arms of the hemostat meet and pivot. These joints must be smooth and well-aligned to facilitate precise movements and consistent clamping. Proper maintenance of shank joints ensures longevity and optimal performance of the instrument.
Types of Hemostats and Variations
Hemostats come in various designs, including straight, curved, mosquito, and Kelly types. While the fundamental parts remain the same, the size, tip shape, and jaw serrations can vary based on the intended surgical application. Familiarity with these variations helps medical professionals select the appropriate hemostat for each procedure.
- Mosquito HemostatSmall tips for delicate procedures and fine vessels.
- Kelly HemostatMedium size, used for larger vessels and tissue manipulation.
- Crile HemostatFully serrated jaws for firm grip on tissues and vessels.
Importance of Proper Labeling
Labeling the parts of a hemostat is critical for educational purposes and practical application. Medical students, surgical trainees, and operating room staff benefit from understanding the anatomy of the instrument. Proper labeling also ensures safe handling, reduces the risk of injury, and facilitates communication among the surgical team during procedures.
Maintenance and Sterilization
Correct handling of a hemostat involves not only understanding its parts but also maintaining its cleanliness and functionality. Sterilization is essential to prevent infections, and all parts from tips to finger rings must be thoroughly cleaned and inspected for damage. Regular checks of the ratchet lock and box lock ensure smooth operation and prevent unexpected failures during surgery.
Understanding the parts of a hemostat is fundamental for anyone involved in surgical procedures. From the tips and jaws to the ratchet lock and finger rings, each component plays a vital role in ensuring effective and safe use. Proper knowledge, labeling, and maintenance of the hemostat not only enhance surgical efficiency but also contribute to improved patient outcomes. As a versatile and indispensable tool in modern medicine, the hemostat remains a key instrument for controlling bleeding and facilitating precise surgical interventions.