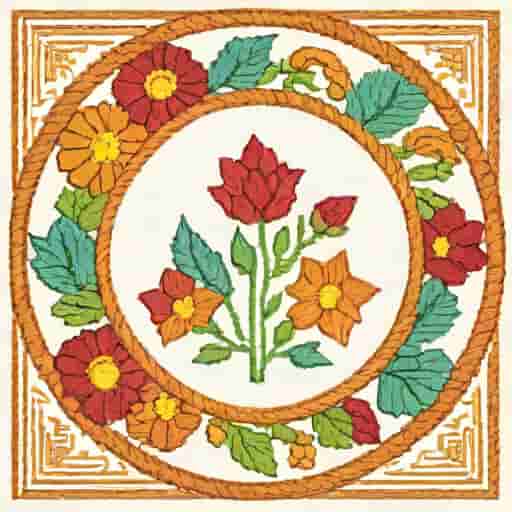
Crewel embroidery is a timeless form of decorative stitching that has been practiced for centuries, combining artistry, patience, and skill to create intricate designs on fabric. Unlike other types of embroidery, crewel uses wool threads and features a variety of traditional stitches to produce textured, raised patterns that are both visually appealing and tactile. This type of embroidery can be applied to home décor items like cushions, wall hangings, and curtains, as well as on clothing and accessories. Learning how to do crewel embroidery opens the door to a creative and relaxing craft that allows individuals to express themselves while developing fine motor skills and attention to detail. With the right materials, techniques, and guidance, beginners and experienced crafters alike can create beautiful works of art through crewel embroidery.
Understanding Crewel Embroidery
Crewel embroidery is a specific type of surface embroidery that utilizes wool threads to create raised designs on tightly woven fabrics. Traditionally, it is known for its use in floral, foliate, and animal motifs, and its ability to create depth and dimension through textured stitches. The technique can range from simple outlines to complex, multi-layered patterns that require practice and precision.
Materials Needed
Before beginning crewel embroidery, it is essential to gather the appropriate materials. High-quality materials can greatly affect the final outcome of your project.
- FabricTightly woven fabrics like linen, cotton, or twill are ideal for supporting wool threads.
- Wool ThreadsCrewel wool is preferred due to its thickness and texture, which provides depth to the stitches.
- Embroidery NeedleA sharp needle with a large eye suitable for threading wool is necessary.
- Embroidery HoopA hoop keeps the fabric taut, making stitching easier and preventing puckering.
- PatternPre-drawn patterns or freehand sketches can guide your stitching.
- ScissorsSmall, sharp scissors are helpful for precise thread cutting.
Basic Stitches in Crewel Embroidery
Crewel embroidery relies on a variety of stitches to create texture, dimension, and intricate designs. Familiarity with these stitches is key to mastering the craft.
Stem Stitch
The stem stitch is often used for outlines and curved lines. It creates a smooth, slightly raised line that works well for stems, borders, and detailing. To perform the stem stitch
- Bring the needle up through the fabric at the starting point.
- Insert the needle a short distance ahead and bring it up halfway back toward the previous stitch.
- Repeat, keeping stitches even in size for a continuous line.
Split Stitch
The split stitch is ideal for filling narrow areas or creating textured outlines. It involves splitting the thread of the previous stitch to build a solid line.
Satin Stitch
Satin stitch is used for filling in shapes and creating smooth surfaces. It is formed by placing parallel stitches close together, covering the fabric completely in the desired area.
French Knots
French knots add small, raised dots to designs, perfect for flower centers or decorative accents. Wrap the thread around the needle and pull through the fabric carefully to maintain uniformity.
Chain Stitch
The chain stitch creates a linked pattern resembling a chain and is commonly used for outlining or decorative purposes. This stitch adds a flowing texture to leaves, vines, and borders.
Step-by-Step Guide to Crewel Embroidery
Following a structured approach ensures a successful crewel embroidery project. Beginners should practice each step carefully before attempting complex designs.
Step 1 Prepare the Fabric
- Wash and iron the fabric to remove wrinkles and dirt.
- Place the fabric in an embroidery hoop to keep it taut during stitching.
Step 2 Transfer the Pattern
- Use a washable fabric pen or pencil to lightly trace your pattern onto the fabric.
- Ensure lines are visible but not too dark, so they can be removed after finishing.
Step 3 Thread the Needle
- Cut a length of crewel wool and thread it through the needle.
- Tie a small knot at the end of the thread to secure it when starting.
Step 4 Begin Stitching
- Start with outlines using stem or split stitches to define the design.
- Fill larger areas with satin stitch, alternating colors for depth and shading if desired.
- Add texture and details with French knots or chain stitches as needed.
Step 5 Maintain Tension
Keep stitches even and avoid pulling the thread too tightly, which can distort the fabric. A relaxed, consistent tension creates a smooth, professional finish.
Step 6 Finish the Project
- Once stitching is complete, carefully remove the fabric from the hoop.
- Trim excess threads and gently wash the fabric if necessary to remove pattern markings.
- Iron on the reverse side to flatten and protect stitches.
Advanced Techniques and Tips
After mastering basic stitches, crafters can experiment with advanced techniques to create intricate, dynamic designs.
Shading and Blending
- Use multiple shades of wool to create depth in petals, leaves, or other design elements.
- Blend colors gradually using long and short stitches for a natural look.
Layering Stitches
- Combine different stitch types within the same area to add texture and visual interest.
- Layer stitches carefully to prevent overcrowding and maintain clarity of the design.
Experimenting with Surfaces
- Crewel embroidery can be applied to cushions, wall hangings, clothing, and accessories.
- Choose projects based on skill level and desired visual impact.
Common Mistakes to Avoid
Even experienced crafters can make mistakes that affect the final outcome. Avoiding these pitfalls ensures a polished project.
- Using thread that is too thin or unsuitable for wool embroidery, which reduces texture.
- Pulling stitches too tightly, causing puckering or distortion.
- Neglecting to secure thread ends, leading to unraveling over time.
- Skipping practice on individual stitches before attempting a full design.
Crewel embroidery is a rich, creative craft that combines traditional techniques with artistic expression. Learning how to do crewel embroidery involves understanding materials, mastering essential stitches, practicing proper tension, and gradually progressing to advanced techniques like shading and layering. Whether creating home décor, accessories, or personalized gifts, crewel embroidery allows individuals to produce beautiful, textured designs that reflect skill and creativity. By practicing regularly, paying attention to detail, and experimenting with different stitches and patterns, anyone can enjoy the rewarding process of creating intricate and timeless embroidered artwork.