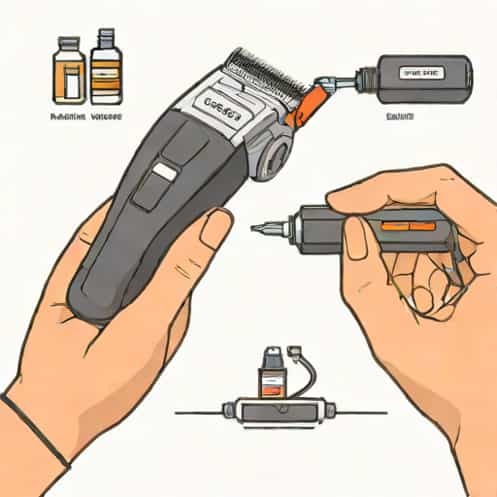
Knowing how to put a battery in a Wahl Micro Groomsman is a simple but important skill for anyone who owns this compact grooming tool. Many users assume the device is rechargeable and feel confused when it stops working, even though the solution is often as easy as installing a fresh battery. With a clear understanding of the battery compartment, proper handling, and correct battery type, you can keep your trimmer working smoothly and reliably for everyday grooming needs.
Understanding the Wahl Micro Groomsman Design
The Wahl Micro Groomsman is designed as a lightweight, portable grooming tool mainly used for detailing, trimming eyebrows, nose hair, ear hair, and small facial areas. Its slim shape makes it easy to handle, but it also means the battery compartment is discreet and sometimes overlooked.
Unlike larger trimmers, this model does not use a built-in rechargeable battery. Instead, it relies on a single replaceable battery, which makes maintenance straightforward once you understand the process.
Identifying the Correct Battery Type
Before learning how to put battery in Wahl Micro Groomsman, it is essential to know which battery the device requires. Using the wrong battery can cause poor performance or damage.
Common Battery Specification
Most Wahl Micro Groomsman models use one AAA battery. This is a standard battery size that is widely available and easy to replace.
Using a fresh, high-quality AAA battery ensures consistent power and smooth trimming.
Preparing to Insert the Battery
Preparation helps prevent mistakes and makes the process quicker. Start by placing the trimmer on a clean, flat surface with good lighting.
Make sure your hands are dry, as moisture can interfere with battery contact or cause corrosion over time.
Safety Considerations
- Ensure the trimmer is switched off
- Keep batteries away from children
- Do not mix old and new batteries
These simple precautions help protect both the device and the user.
Locating the Battery Compartment
The battery compartment on the Wahl Micro Groomsman is typically located at the bottom of the handle. It is designed to blend seamlessly with the body of the trimmer.
You may notice a slight seam or twistable cap at the base. This is the part that opens to allow battery insertion.
How the Compartment Opens
Most models open by twisting the bottom cap counterclockwise. The motion is gentle and does not require force.
If the cap feels tight, try gripping it with dry fingers and applying steady pressure.
Step-by-Step Battery Installation
Once the compartment is open, inserting the battery is a simple process. Taking your time ensures correct placement and optimal performance.
Insertion Process
- Remove the bottom cap completely
- Insert one AAA battery into the handle
- Align the positive and negative ends correctly
- Replace the cap and twist it clockwise
The battery orientation is crucial. The positive end usually faces upward toward the cutting head, but checking the markings inside the compartment is always recommended.
Checking Battery Orientation
Inside the battery compartment, small symbols indicate where the positive and negative ends should be placed. These symbols help prevent incorrect installation.
If the battery is reversed, the trimmer will not turn on. Correcting the orientation usually solves the issue immediately.
Testing the Trimmer After Installation
After closing the battery compartment, switch the trimmer on to confirm it is working properly. You should hear a smooth, steady sound from the motor.
If the trimmer does not turn on, double-check the battery position and ensure the cap is fully tightened.
Signs of Proper Function
- Consistent motor sound
- No flickering power
- Smooth blade movement
These signs indicate that the battery has been installed correctly.
Common Mistakes to Avoid
Many users encounter issues because of simple errors during battery installation. Being aware of these mistakes can save time and frustration.
Frequent Errors
- Using a dead or weak battery
- Forcing the compartment cap
- Ignoring polarity markings
A gentle and careful approach is always better than applying force.
How Often the Battery Needs Replacement
The lifespan of the battery depends on usage frequency and battery quality. Occasional users may only need to replace the battery every few months.
Frequent use, especially for detailed trimming, may require more regular replacement.
Signs the Battery Is Running Low
Slower blade movement, reduced cutting power, or intermittent operation usually indicate a weak battery.
Replacing the battery promptly helps maintain grooming precision.
Maintaining the Battery Compartment
Keeping the battery compartment clean extends the life of the Wahl Micro Groomsman. Over time, dust or residue can build up inside.
When changing batteries, inspect the compartment for corrosion or debris.
Simple Maintenance Tips
- Remove the battery if not used for long periods
- Wipe contacts gently with a dry cloth
- Store the trimmer in a dry place
These habits help ensure reliable power delivery.
Choosing the Right Battery Quality
While any AAA battery can work, higher-quality batteries tend to last longer and provide more consistent power.
Rechargeable AAA batteries may also be used, but their voltage output can differ slightly.
Disposable vs Rechargeable Batteries
Disposable batteries offer convenience and strong initial power, while rechargeable options are more environmentally friendly.
Choose based on your grooming routine and preference.
When the Trimmer Still Does Not Work
If you have followed all steps and the device still does not turn on, the issue may not be battery-related.
Possible causes include internal motor issues or worn electrical contacts.
Basic Troubleshooting
- Try a different new battery
- Ensure the cap is fully secured
- Check for visible damage
If problems persist, professional servicing may be required.
Learning how to put battery in Wahl Micro Groomsman is an essential part of owning and maintaining this grooming tool. The process is simple, quick, and does not require special tools or technical skills.
By using the correct battery, following proper installation steps, and maintaining the compartment, you can ensure consistent performance and extend the life of your trimmer. With regular care, the Wahl Micro Groomsman remains a reliable companion for precise and comfortable grooming.